How to Draw a Dove Bird Step by Step

Today we will learn several simple tips on how to draw a dove.
Contents
- 1 Materials for Simple Dove Drawing
- 2 How to Draw a Dove Step by Step
- 2.1 The Lines and Shape
- 2.2 Improving the Silhouette
- 2.3 Improvements Shadows and a Bit of Color
- 3 Some Structure Features
- 3.1 Legs
- 3.2 Head
- 3.2.1 Eyes
- 3.2.2 Beak
- 4 How to Draw the Dove of Peace
- 5 Video Tutorial on How to Draw Doves
Materials for Simple Dove Drawing
We will need:
- graphite pencils of different hardness
- paper for sketches
- eraser
- pastel or colored pencils.
How to Draw a Dove Step by Step
Before you start painting, find the nature and look carefully at the good photos. If there is an opportunity, look at these birds on the street.
Here are several examples of different drawings of doves.
1. The bird in flight: here the wings and tail are clearly visible; the main thing in this sketch is the shape and the location of plumage.
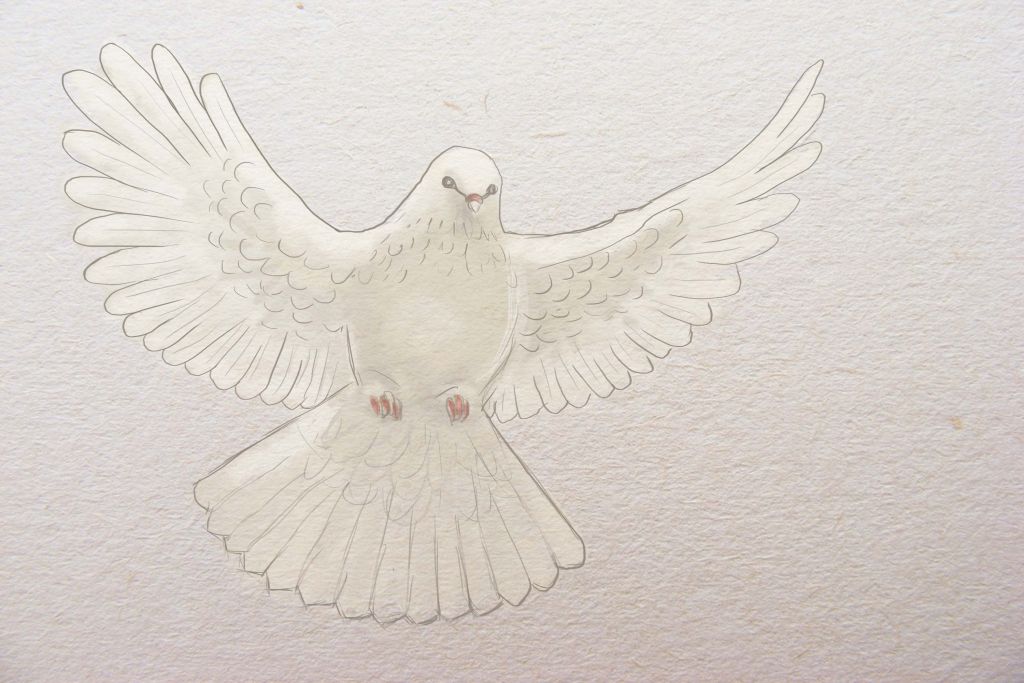 2. The white dove on a branch — here is the good silhouette drawn in profile.
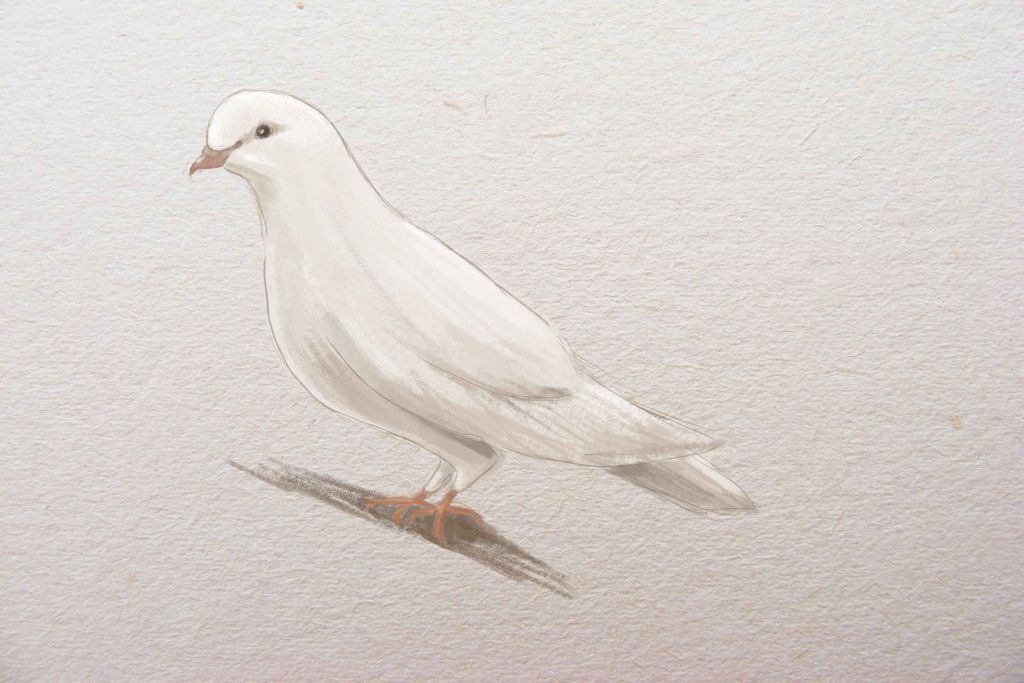 3. The grey dove in three-quarter — here is the more complicated pose and the interesting coloring; the legs and the peculiarities of beak and eyes are clearly visible.
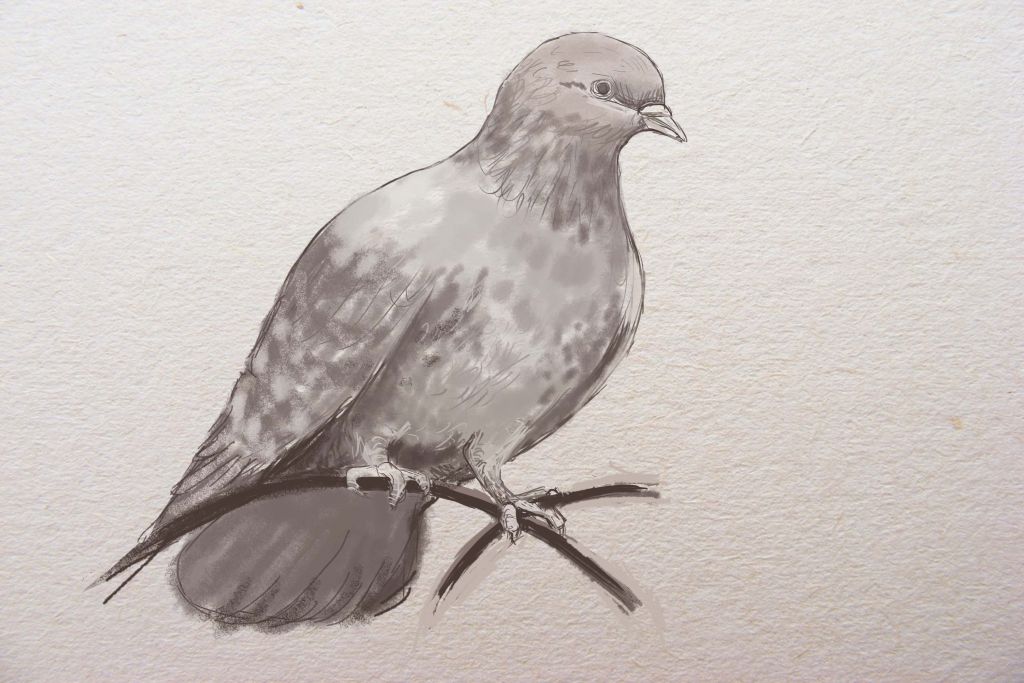
The Lines and Shape
1. The bird with unfolded wings is better to be marked with two lines. The first one characterizes the direction of wings and the second – the head, neck, and body.
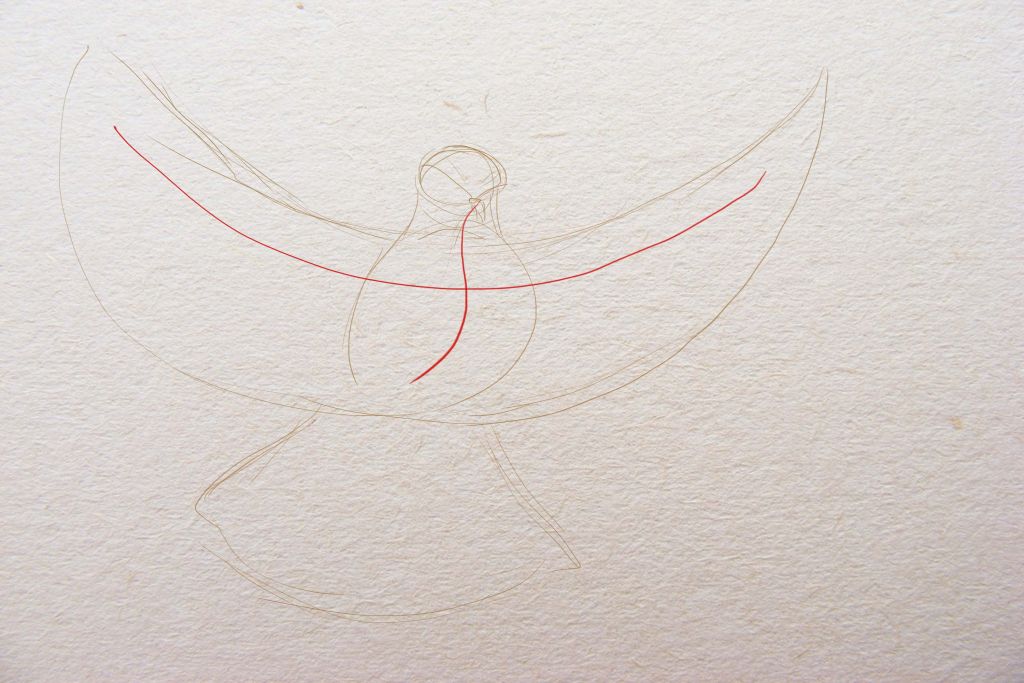 2. The simple static posture can be shown with a smooth tilted line.
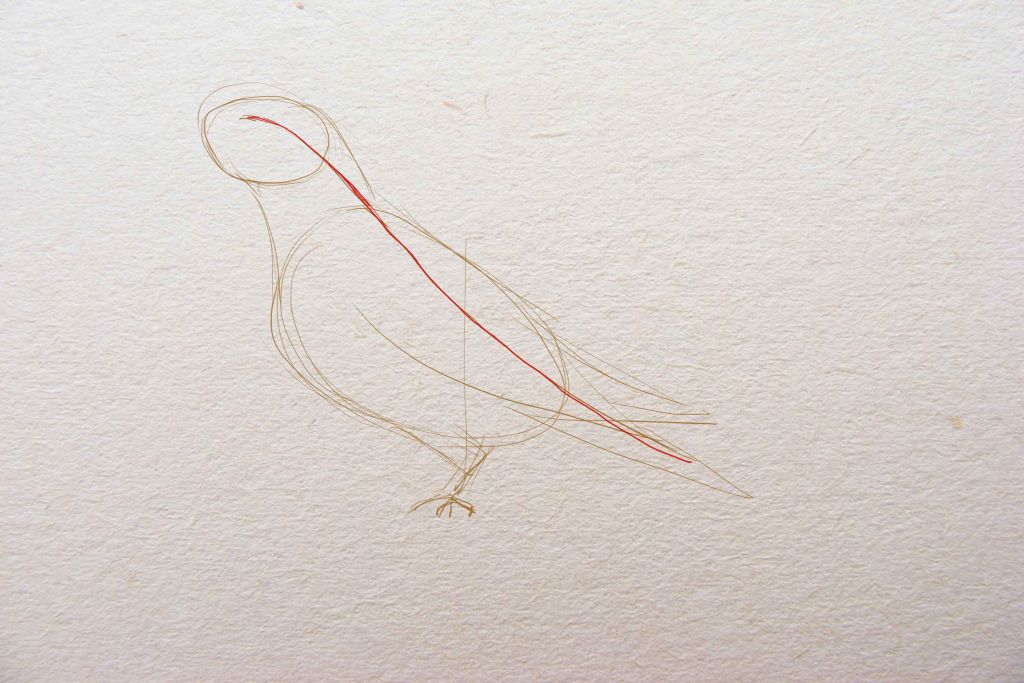 3. If the posture is more complicated, you can add auxiliary lines, showing the location of the legs and body.

Improving the Silhouette
Improve the previously applied lines and add the main important details. Now the lines can be clearer but without final expressiveness.
1. When painting the bird with unfolded wings, it is important to show the direction and the shape of feathers properly. Outline the big primary feathers and small coverts with the slight lines. All the feathers are attached to the wing-body, are directed downwards, and diverge gradually to different sides when the wing is unfolded.
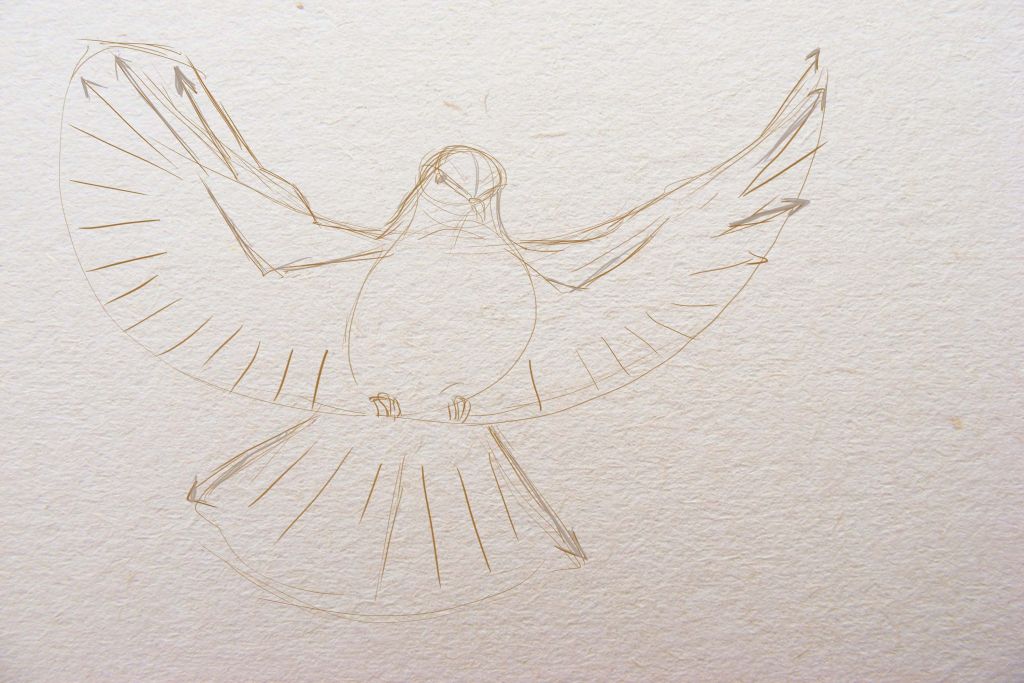
Also, outline the eyes and beak line; they are located on the axis that cuts the oval of a head in half. Show the small legs at the bottom of the body. 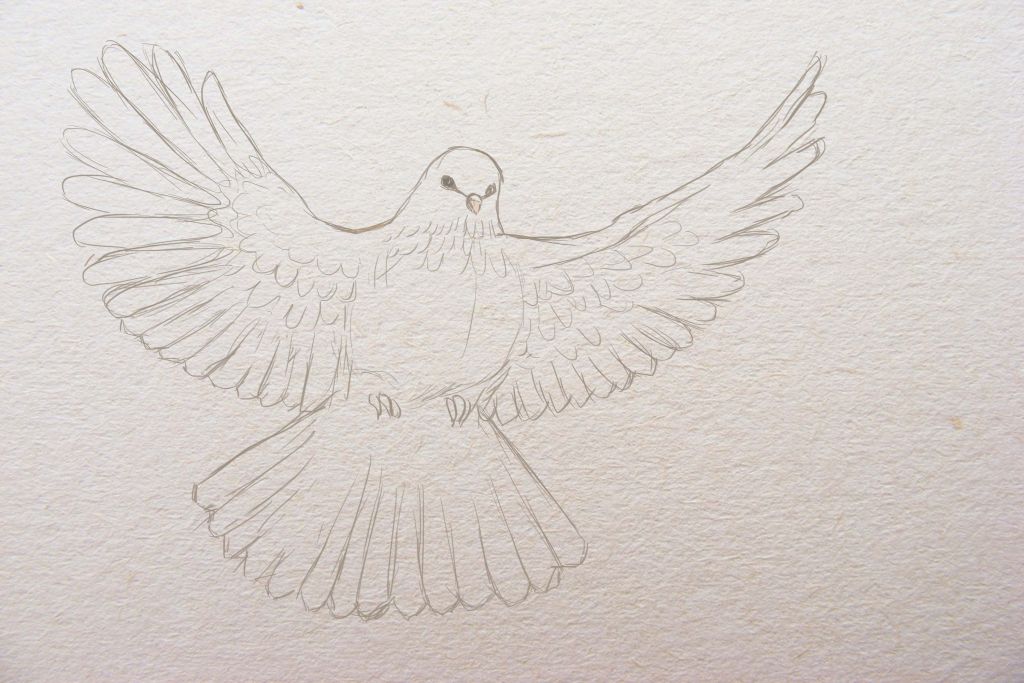
2. We can show the shape of the wings and tail more clearly in this sketch. Mark the legs and the claws in the general silhouette.
We should outline the eyes and the beak of a bird. This can be done if we divide the oval of a head into two parts with the horizontal line (the lower part is a bit smaller than the upper one). The horizontal axis should show the direction of the bird`s gaze. This line divides the beak into lower and upper parts. We should also locate the eye above this axis.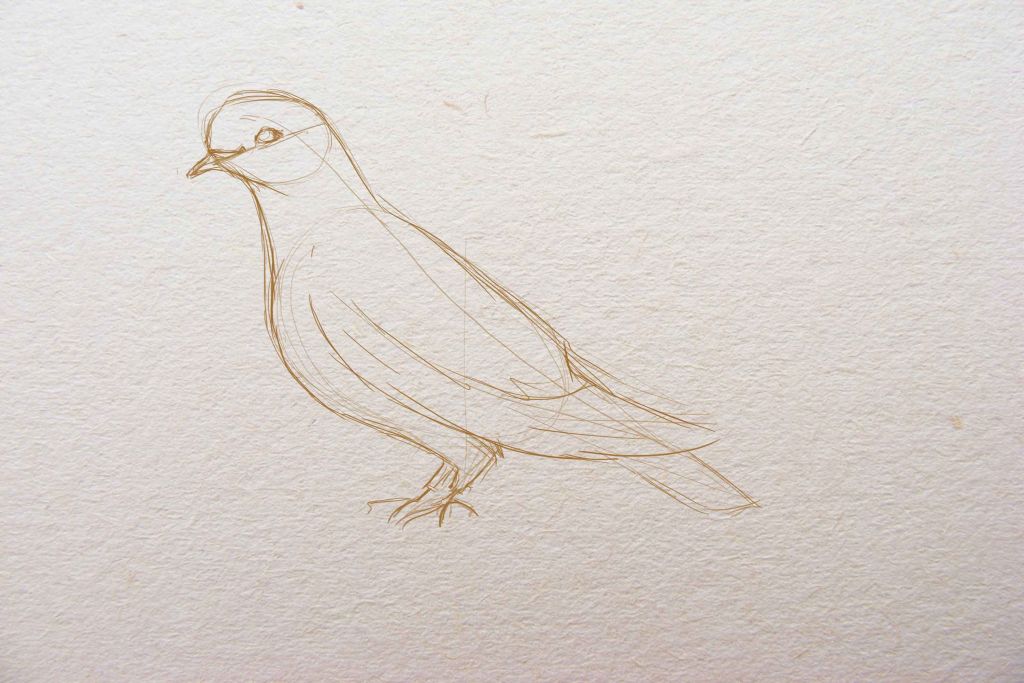
3. Let`s show the shape of wings and tails and the direction of feathers more clearly on this drawing of a dove. According to the above-mentioned recommendations, we will locate the eyes and the beak. Mark the small arc above the upper part of a beak. It is important to show the rounded chest of a bird and the protruding legs.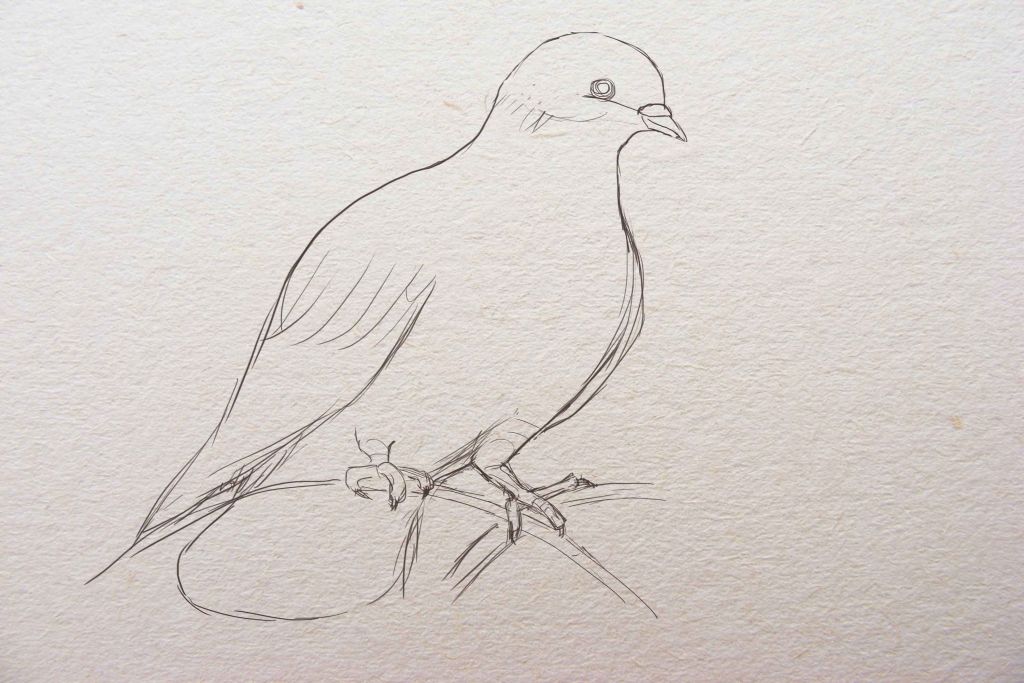
Improvements Shadows and a Bit of Color
At the final stage of the work, we should maximally improve our drawing of a dove. We can draw in the pattern on feathers, some folds and relief on them, and improve the shape of legs, beak, and eyes.
The picture will become more expressive if we add the shadows. They are usually formed under the wings, in the bottom part of a body, and under the legs and tail.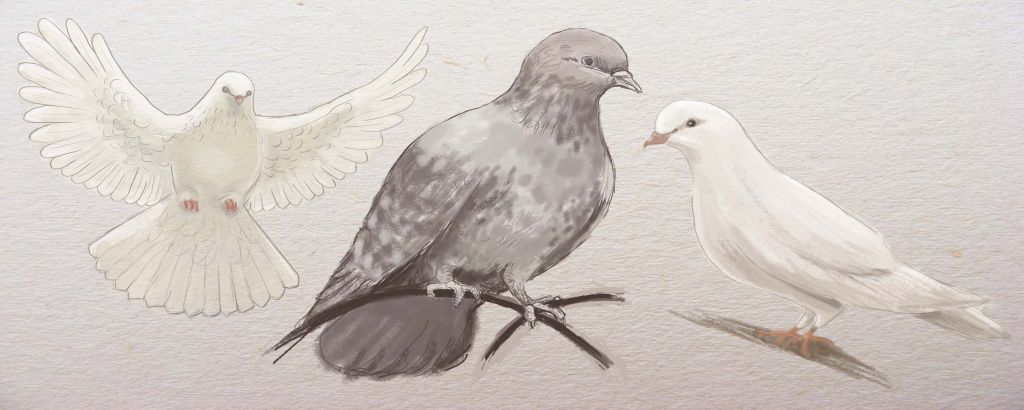
Some Structure Features
It is quite easy to draw the doves of peace, but still, let`s consider some of the nuances.
Legs
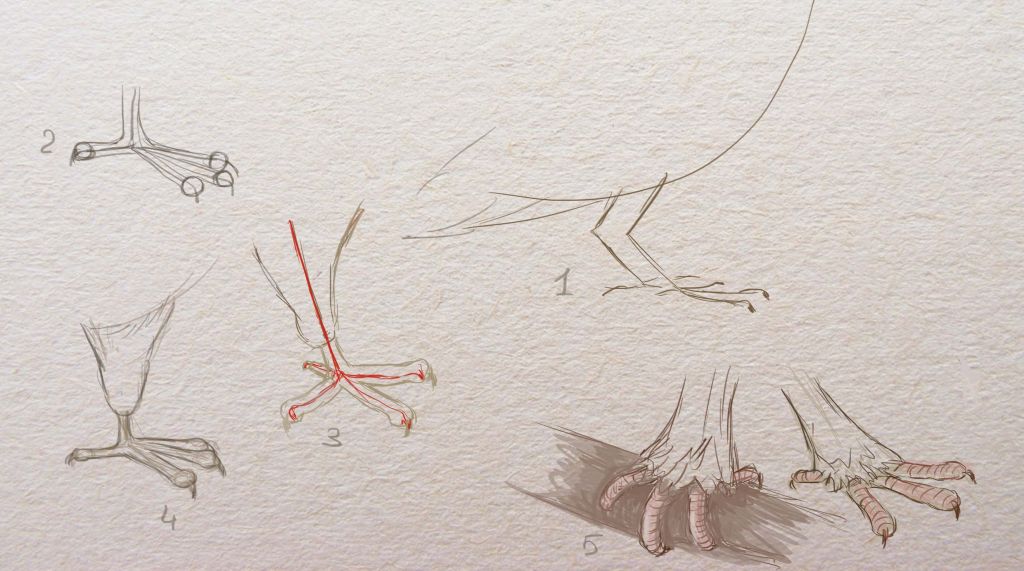
- At first, show the angle and the position of fingers.
- Give thickness to the line with the help of simple shapes and add the claws on the tips of fingers and the circles – the indurations on the fingers.
- Connect all the shapes with a smooth line, creating a clear silhouette.
- Improve the lines and add the shadow.
- Add the color, for example, the dove grey color, and some peculiarities and details.
Head
In most cases the following scheme will be the right one:
-
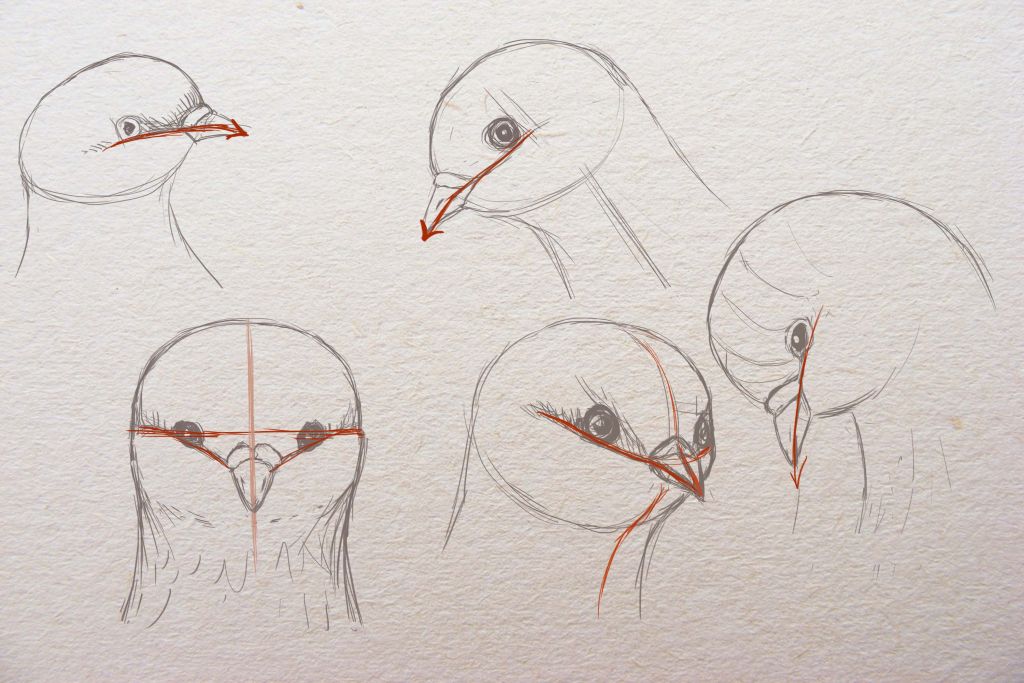 Inscribe the head into the oval which is located horizontally.
 - Cut this oval in half with the help of the horizontal and vertical axis.
- To locate the beak and the eyes, we should draw one more horizontal line a bit below the center. This line is shown with the red color on the picture. It goes through the center of a beak and divides it into maxilla and mandible.
- The eyes and beak are connected with some stroke which helps us orient the structure of a head better and draw it properly. This slight stroke goes from the center of a beak under the base of an eye further to the ear of the bird`s ear. Actually, this stroke and our red arrow are the same things.
- The red line helps us determine and show the direction of the bird`s gaze on the picture.
Eyes
The red line and the vertical axis help us place the eyes – we should draw them in the corner of the intersection of these lines.
The eyes are usually round and sometimes they can be slighted elongated into an oval. The majority of breeds have a small halo around the eyes. It highlights and visually enlarges the eyes with its contrasting color. Most often, the eyes of these birds are orange with a big black pupil in the center.
Beak
The maxilla is a bit bigger than the lower part of a beak and is slightly bent downwards. The maxilla has a strip or even bulge of contrasting color at a base near the head. There are two holes resembling nostrils on the maxilla.
The lower part of a beak is not so highlighted and has a duller color.
How to Draw the Dove of Peace
For the first time, it was depicted by Pablo Picasso. He painted it as a symbol and emblem of the World Peace Congress. Here is Pablo Picasso dove of peace:
 Let`s try to create our own picture – the symbol of peace:
We will use a hard graphite pencil during the first two stages and paint very gently so that the line is barely visible.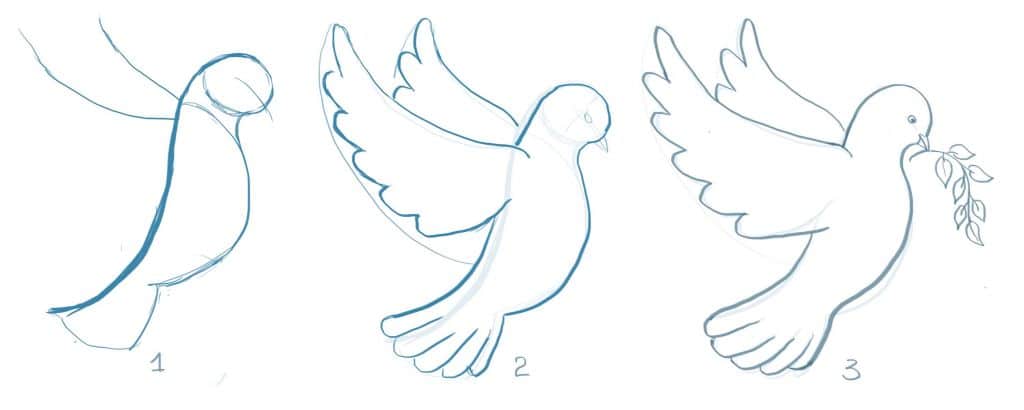
- Show the beautiful curve of the bird`s body with a smooth curved line. Outline the head and the body with an oval or a circle. Add two lines directed upwards – they will show the direction of wings.
- Draw the arcs from the line of wings to the body. Inscribe the wings into the resulting shape with the help of wavy lines. Also, outline the tail. Improve the silhouette. Slightly outline the eyes and beak.
- Improve all the lines of the dove of peace and add the details. You can paint confidently, clearly drawing in the contour. Improve the eyes, beak, and feathers. Draw the olive branch, starting from the curved line and then adding the leaves.
Video Tutorial on How to Draw Doves
Here are several interesting works with these birds to inspire you:
- I hope this lesson was useful and interesting for you and you will create wonderful works with these beautiful birds.
I wish you new successes in your creative work!
How to Draw a Dove Bird Step by Step
Source: https://artanddrawing.com/drawing/how-to-draw-a-dove
0 Response to "How to Draw a Dove Bird Step by Step"
Post a Comment